
Introduction to Gilding with Sue Lui
Posted by Sarah @ PIA on Jan 17th 2023
Here at Paper & Ink Arts we provide a wide selection of supplies for gilding, but it can be confusing to figure out how to use certain materials if you're just starting out. We're partnering with Sue Lui from @oliveleafcalli to give readers a simple introduction to the art of illuminated letters.
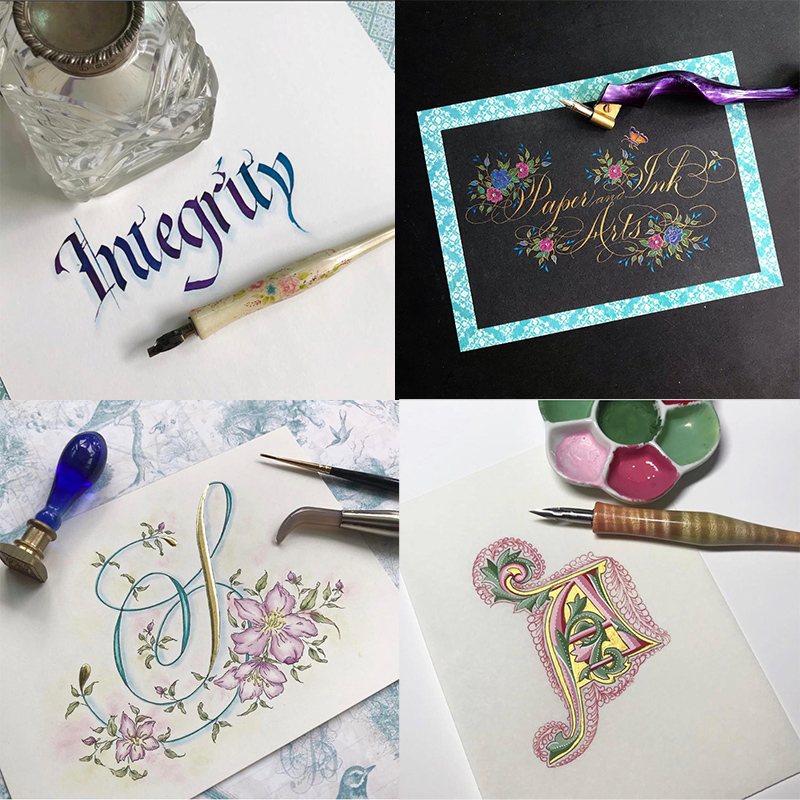
Hello! This is Sue from @oliveleafcalli. A little about me: I started calligraphy in 2013/2014, where I first took an interest in pointed pen calligraphy, Copperplate in particular. From there, I fell deep into the rabbit hole and started learning Italic, Uncial, Spencerian and more. My latest interest is in illuminated letters. I first tried out gilding in 2017, when I bought some faux gold and gilding medium while I was on holiday in Venice. I then proceeded to try gilding in my hotel room. It was a quick rudimentary piece, but it was fun and different, and I was hooked. Since then, I have gone on to take lessons from some of the best practitioners around the world and enjoy the classes tremendously. I like workshops. I learn a lot from each one because everyone has their own way of doing things. I take what works for me and bear in mind what may not work and adapt it to my needs. Here are some examples of the kind of work I enjoy creating:
The first step to any illuminated letter is the design. If you like historical designs, there are lots of historical references which you can get from books and online, or you can design your own. I’ll be showing you how I gild and paint a letter I designed. First off, after tracing your design to a piece of smooth paper, we need to lay the gilding medium. In this instance, I’m using Instacoll, a water-based size that works well for genuine gold. Load your brush with Instacoll and apply it to your paper. Gently spread the Instacoll with your brush, pushing it along. The aim is to allow the Instacoll to pool, and not brush it on, so as to reduce brush lines. Using the wet-on-wet method, add more Instacoll to that which is already on your paper. When your design is covered, allow it to dry on a flat surface. Drying time depends on how large an area you’ve covered. Smaller areas may take just 15 minutes to dry. Slightly larger ones may take 30-5 minutes.
This next video covers applying 22k gold leaf to the design. I am using transfer gold leaf, which is easier to apply than loose gold leaf. Make sure your Instacoll is dry before applying the gold leaf. You have a window period of about an hour to apply your gold leaf to the Instacoll after it’s dry. Press your gold to your size, and using the pads of your finger tips, press down firmly, making sure the gold leaf sticks to all of your size. If some bits of the gold don't take, try again. If you’re still having difficulty getting the gold to stick, breathe on the size to activate it with your warm breath. Polish up your gilding with a cotton bud and admire the glittering goodness.
Now we’re on to the final stage of the illuminated letter. I painted the flowers and leaves with gouache, added more gilded bits, and finally some Swarovski crystals for the added bling: and that’s my illuminated letter S done!
One more thing: Did you know you can gild on calligraphy? You can, using miniatum ink. This is a gilding medium that’s thinner in viscosity compared to Instacoll, so you can write with it using a calligraphy nib. As the size is still more viscous than ink, it is a little more difficult to write with than with calligraphy ink, so you’ll need to go slower. But the shiny results are well worth the effort. In the video, you’ll see that I’m using my trusty Paper and Ink Arts Adjustable Oblique Holder. It was my first oblique holder and one I still use because I love the adjustable flange. It’s a tool I regularly recommend to my friends and students.
I hope you’ve enjoyed the process. For more samples of other illuminated pieces I’ve made, check out my blog @oliveleafcalli. Do tag me at @oliveleafcalli if you decide to try some gilding. Thanks for hanging out with me :)
Products used in this How-to-Guide:
All gilding supplies, including Instacoll, miniatum ink, burnishers, and gold leaf, can be found here.
Winsor & Newton gouache can be found here.
You can find Sue Lui on Instagram at @oliveleafcalli, or you can visit her website to register for her calligraphy & illumination workshops.